私有部署
注意
公共代理节点仅限于以下域名使用:
https://down.mptext.tophttp://localhosthttp://127.0.0.1
如果私有部署后使用其他域名访问,需要 搭建自己的代理节点。
本地运行
适合开发者调试或临时使用,需要 Node.js >= 22 环境。
- 拉取代码
shell
git clone git@github.com:wechat-article/wechat-article-exporter.git
cd wechat-article-exporter- 安装依赖
shell
yarn- 启动开发服务器
shell
yarn dev启动后打开 http://localhost:3000 即可使用。
Docker 运行(推荐)
适合长期使用,无需搭建开发环境。
拉取镜像
shell
docker pull ghcr.io/wechat-article/wechat-article-exporter:latest启动容器
容器暴露端口 3000,内部数据目录为 /app/.data。
shell
docker run -d \
  --restart always \
  --name wechat-article-exporter \
  -e NODE_TLS_REJECT_UNAUTHORIZED=0 \
  -p 3000:3000 \
  -v ./.data:/app/.data \
ghcr.io/wechat-article/wechat-article-exporter:latestshell
docker run -d \
  --restart always \
  --name wechat-article-exporter \
  -e NODE_TLS_REJECT_UNAUTHORIZED=0 \
  -p 3000:3000 \
  -v ./.data:/app/.data \
ghcr.io/wechat-article/wechat-article-exporter:latest提示
-v ./.data:/app/.data 会将容器内的数据映射到当前目录的 .data 文件夹,确保容器重启后数据不丢失。
启动后打开 http://localhost:3000 即可使用。
docker compose + mkcert 自签名证书
使用mkcert生成自签名证书
mkcert的安装及使用可以查看官方文档
shell
# 在系统中安装根证书(只需执行一次)
mkcert -install执行以下代码生成本地 IP 对应的证书文件:
shell
# 这里可以列出你最终访问的ip
mkcert localhost 127.0.0.1 ::1该命令会生成2个pem文件,分别对应证书和密钥文件,如下图所示: 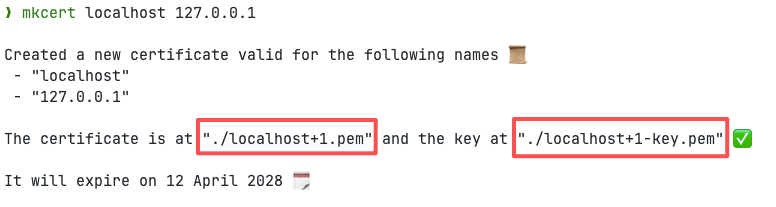
将这两个文件重命名为cert.pem和key.pem,并放在certs目录中。
拷贝nginx.conf和docker-compose.yaml文件
nginx
server {
    listen 80;
    server_name localhost;

    # HTTP 自动重定向到 HTTPS
    return 301 https://$host$request_uri;
}

server {
    listen 443 ssl;
    server_name localhost;

    # SSL 证书路径(根据你实际文件名调整)
    ssl_certificate /etc/nginx/certs/cert.pem;
    ssl_certificate_key /etc/nginx/certs/key.pem;

    # 推荐的 SSL 配置(增强安全性)
    ssl_protocols TLSv1.2 TLSv1.3;
    ssl_ciphers HIGH:!aNULL:!MD5;
    ssl_prefer_server_ciphers on;

    location / {
        proxy_pass http://app:3000;  # 代理到应用容器
        proxy_set_header Host $host;
        proxy_set_header X-Real-IP $remote_addr;
        proxy_set_header X-Forwarded-For $proxy_add_x_forwarded_for;
        proxy_set_header X-Forwarded-Proto $scheme;
        proxy_set_header X-Forwarded-Host $host;
    }
}yaml
services:
  app:
    image: ghcr.io/wechat-article/wechat-article-exporter:latest
    restart: always
    environment:
      - NODE_TLS_REJECT_UNAUTHORIZED=0
    volumes:
      # 持久化 KV 数据(防止容器重启丢失)
      - .data:/app/.data

  nginx:
    image: nginx:alpine
    container_name: wechat-article-nginx
    restart: always
    ports:
      - "80:80"    # HTTP(会自动重定向到 HTTPS)
      - "443:443"  # HTTPS
    volumes:
      - ./certs:/etc/nginx/certs:ro          # 挂载证书(只读)
      - ./nginx.conf:/etc/nginx/conf.d/default.conf:ro  # 挂载配置
    depends_on:
- app将以上所有文件放在一个目录中,比如app目录,最终的目录结构如下:
text
app
├── certs
│   ├── cert.pem
│   └── key.pem
├── docker-compose.yml
└── nginx.conf在该目录中执行docker compose up -d启动,然后就可以通过https://localhost(或者你的本地ip)访问 https 网站程序了。
Vercel 快速部署
一键部署
点击下方按钮一键部署到 Vercel:
手动部署
Fork 本项目到你的 GitHub 账号
在 Vercel 中导入项目
- 访问 Vercel
- 点击 "Add New..." → "Project"
- 选择你 Fork 的项目仓库
配置项目
- Framework Preset: 选择
Nuxt.js - Root Directory: 保持默认
./ - Build Command: 保持默认或使用
yarn build - Output Directory: 保持默认
.output/public
- Framework Preset: 选择
配置环境变量(可选)
- 在项目设置中添加所需的环境变量(见下方环境变量说明)
点击 "Deploy" 完成部署
环境变量
以下环境变量均为可选项。本地运行时在项目根目录创建 .env 文件即可;Docker 运行时通过 --env-file .env 传入。
数据存储(KV)
登录会话等数据通过 KV 存储持久化,不同部署方式配置不同:
dotenv
# 本地 / Docker 部署(基于文件系统)
NITRO_KV_DRIVER=fs
NITRO_KV_BASE=.data/kv

# Cloudflare 部署(使用 Cloudflare KV)
# NITRO_KV_DRIVER=cloudflare-kv-binding调试模式
dotenv
# 调试微信代理请求(仅开发环境生效)
NUXT_DEBUG_MP_REQUEST=trueAG-Grid 企业版授权
dotenv
# 文章列表使用 AG-Grid 展示,企业版授权可解锁更多功能
NUXT_AGGRID_LICENSE=网站统计(umami)
dotenv
# https://umami.nuxt.dev/api/configuration
NUXT_UMAMI_ID=
NUXT_UMAMI_HOST=错误监控(Sentry)
dotenv
# https://docs.sentry.io/platforms/javascript/guides/nuxt/manual-setup/
NUXT_SENTRY_DSN=
NUXT_SENTRY_ORG=
NUXT_SENTRY_PROJECT=
NUXT_SENTRY_AUTH_TOKEN=